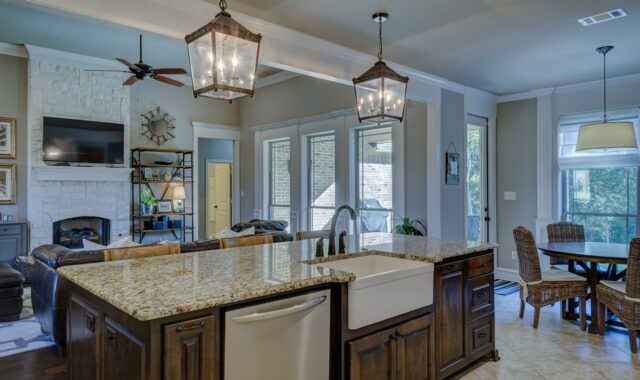
How to install a quartz stone table top safely and correctly

a[data-rs-seo-link]{text-decoration:underline!important;color:#1a56db!important;cursor:pointer!important;}a[data-rs-seo-link]{text-decoration:underline!important;color:#1a56db!important;cursor:pointer!important;}
Start with the right installation assumptions
A quartz stone table top should be handled as a heavy, rigid engineered surface, not as a structural shelf. Most installation failures come from predictable issues: an uneven base, unsupported overhangs, tight cutouts, hard mechanical fastening, poor seam planning, on-site cutting dust, or unrealistic expectations about heat resistance. A safer installation sequence is to template after the base is fixed, fabricate the slab in a controlled shop, provide continuous or engineered support, allow small movement gaps, bond with flexible silicone, and protect the surface with heat pads and non-abrasive cleaning.
Manufacturer instructions vary by brand, slab thickness, resin system, and application. Any numeric guideline should therefore be checked against the selected quartz supplier’s current technical manual before the layout is approved.

In practice, a table top is less forgiving than many buyers expect. Engineered quartz usually contains mineral particles bound with resin. That construction provides consistent color, low porosity, and easy maintenance, but the slab can still crack under concentrated stress or thermal shock. If you are planning a kitchen island, dining table, vanity table, reception counter, or work surface, use this guide as an installation checklist and compare it with the other resources in our installation guides.
Confirm the material, thickness, and use case
The term quartz stone table top is often used for engineered quartz, but it should not be confused with quartzite, granite, marble, sintered stone, or porcelain. Engineered quartz is normally made from quartz or other mineral aggregates, pigments, and a resin binder. That binder is one reason quartz does not need routine sealing like many natural stones. It is also why hot cookware, direct radiant heat, and long sun exposure can become concerns in some installations.
Before measuring, confirm three points in writing:
- Material type: Verify whether the slab is engineered quartz, natural quartzite, sintered stone, or another surface. Each material has different cutting, support, heat, and warranty requirements.
- Thickness: Common quartz slabs are often around 2 cm or 3 cm thick, but actual product thickness and reinforcement details vary. Thinner tops may require a subtop or closer support.
- Application: A cabinet-supported kitchen top, a pedestal dining table, and a floating vanity all load the slab differently. The same overhang rule should not be applied blindly to every design.
For a freestanding table, the base design is as important as the quartz itself. A narrow pedestal under a wide slab can create leverage at the edge when someone leans on the top. A metal frame, continuous apron, broad plate, or engineered support grid usually distributes load more safely than small point supports. For a cabinet-supported top, confirm that the cabinet boxes are fixed, level, and strong enough before templating.
Template only after the base is stable
Good quartz installation starts before the slab arrives. The support base should be in its final position, securely fastened, and checked for level. Major quartz installation manuals commonly call for a flat and true support surface. One published Q Quartz guideline, for example, uses a tolerance of 1/16 inch in 18 inches for cabinet tops. Treat that as an important warning: quartz can bridge minor imperfections, but it should not be forced to correct a twisted or sagging structure.
During templating, mark all walls, finished panels, appliances, sinks, faucets, cooktops, legs, brackets, and seams. Do not assume walls are square or parallel. A professional template should capture out-of-square conditions and allow a small clearance where the top meets walls or fixed surfaces. Several manufacturer manuals use 1/8 inch as a typical movement or clearance allowance at walls and cutouts, but the final allowance should come from the product instructions and the installer’s judgment.
Check cutouts and inside corners
Cutouts concentrate stress. Sinks, cooktops, cable holes, and inside corners should not be left with sharp internal angles. Some quartz technical manuals call for rounded inside corners, with 3/8 inch appearing as a common minimum radius in published guidance. A sharp corner can behave like a crack starter, especially near heat, vibration, or heavy use.
If a cooktop, undermount sink, or basin is included, the appliance or fixture should not hang from the quartz alone unless the manufacturer specifically permits it. Independent sink rails, brackets, or support systems are often recommended because water-filled sinks and heavy cookware add real load over time.
Design support before approving the slab layout
Support is the most important installation decision for a quartz table top. A top may be polished and visually clean, but it is still a slab with limits. It should not be used as the only structural element for long cantilevers, floating corners, or unsupported seating areas.
| Installation area | What to verify | Why it matters |
|---|---|---|
| Full field under the slab | Continuous cabinet rail, frame, subtop, or engineered support grid | Prevents sagging, twisting, and point stress |
| Overhangs | Thickness-specific bracket, leg, corbel, or panel plan | Reduces leverage when people lean or sit near the edge |
| Seams | Support directly under the joint and on both sides | Keeps seam edges aligned and lowers crack risk |
| Sinks and basins | Independent support rail or sink-setter system | A loaded sink should not depend only on adhesive at the stone edge |
| Pedestal tables | Broad plate, balanced footprint, and anti-tip review | A small base can overload the center or create tipping risk |
For planning, many quartz fabricators treat larger overhangs as a support issue, not a cosmetic detail. One widely published Q Quartz guide lists no additional support for 3 cm material under 16 inches on standard 24 inch cabinets, brackets at 24 inch intervals for 16 to 24 inch overhangs, and legs, columns, or panels beyond that. The same guide is more restrictive for 2 cm material. These figures are useful as a reference point, but they are not a universal rule for every brand, table base, climate, or slab shape.
For a dining-style quartz table, do not copy cabinet overhang numbers without engineering review. A person can lean on one corner, a child may climb on the edge, or the table may be moved by pushing on the slab. A balanced frame that supports the slab near its perimeter is usually more reliable than a center-only pedestal.
Dry-fit, seam, and bond with controlled flexibility
When the fabricated top arrives, the installer should dry-fit it before applying adhesive. This is the time to check edge alignment, wall gaps, overhang depth, color direction, seam location, surface defects, and base contact. Once the slab is bonded, correcting a layout error becomes much more expensive.
Quartz should generally not be fastened with nails, screws, or other mechanical fasteners driven into the slab. Published quartz guidelines commonly recommend flexible 100% silicone dabs for attaching tops to perimeter supports, rather than rigid full-bed adhesive or mechanical fixing. The support carries the weight; the silicone helps prevent movement while allowing small differential movement between the stone and the base.
Seams should be planned, not hidden as an afterthought
A seam may be necessary when the table is longer than the available slab, when transport access is limited, or when a cutout makes a one-piece layout risky. A good seam plan considers visual pattern flow, access, slab strength, and support under the joint. Adhesive color should be matched to the quartz as closely as practical, especially for light colors where dark seam lines are more visible. See also: Building Materials.
For long table tops, discuss whether the seam will sit over a cabinet partition, steel cross member, table frame rail, or other solid support. A seam floating between supports is more vulnerable to lippage, flex, and impact. The installer should also avoid placing seams through high-stress points when another layout is practical.
Control dust, heat, sunlight, and jobsite risk
Cutting, grinding, drilling, or polishing quartz can create respirable crystalline silica dust. OSHA describes respirable crystalline silica as extremely small particles generated during operations such as cutting, sawing, grinding, drilling, and crushing stone or artificial stone. OSHA also identifies serious health risks linked to inhalation, including silicosis, lung cancer, chronic obstructive pulmonary disease, and kidney disease. For this reason, a quartz table top should be fabricated by trained professionals using appropriate wet methods, ventilation, respiratory protection, housekeeping, and exposure controls required by law.
For homeowners and general contractors, the practical rule is straightforward: do not treat on-site dry cutting as a minor adjustment. If a top does not fit, stop and have the installer evaluate the correction method. A small dusty notch cut indoors can create a hazard that is out of proportion to the visible size of the cut.
Heat management continues after installation. Quartz is often described as heat resistant, but it is not heat proof. Manufacturer care documents commonly recommend hot pads or trivets under hot pans, slow cookers, air fryers, electric skillets, griddles, and other heat-generating appliances. Sustained heat near edges, seams, or cutouts is especially risky because thermal expansion can create stress where the slab is already weakened.
Sunlight should also be considered. Some quartz products are intended primarily for interior use, and certain manufacturers advise storing slabs away from extended direct sunlight or limiting prolonged UV exposure. If the table will sit in a sunroom, beside a large west-facing window, or outdoors, confirm that the chosen product is approved for that exposure. If it is not, consider UV-filtering film, shades, an alternative surface, or an outdoor-rated material.
Final inspection and maintenance after installation
Before signing off, inspect the top in natural and artificial light. Check for chips, cracks, surface variation, seam lippage, uneven overhangs, rocking, gaps, and contact points. Minor wall gaps may be intentional to allow movement and caulk coverage, but uneven support under the slab should be corrected before daily use.
Use this handover checklist:
- Confirm the slab is fully supported according to the approved layout.
- Verify that brackets, rails, legs, panels, or frames are securely installed.
- Check that seams are supported and visually acceptable under normal lighting.
- Confirm sinks, basins, or appliances have independent support where required.
- Make sure no screws, nails, or hard fasteners were driven into the quartz.
- Ask what cleaners, pads, and chemicals are approved for the specific brand.
- Record care instructions and warranty exclusions before heavy use begins.
For routine care, clean with a soft cloth or sponge, warm water, and mild dish soap unless the product manual recommends otherwise. Avoid abrasive pads, drain cleaners, oven cleaners, paint strippers, strong solvents, and very high or very low pH chemicals. Quartz normally does not need sealing; applying a sealer can leave an uneven film because the surface is not meant to absorb it. Use cutting boards to protect both the surface and your knives, and use trivets to reduce thermal shock.
Frequently asked questions
Can I install a quartz stone table top myself?
Small prefabricated tops may look manageable, but quartz is heavy, brittle at unsupported points, and hazardous to cut without professional controls. For most full-size table tops, professional templating, transport, fabrication, and installation are the safer choice.
Does a quartz table top need plywood underneath?
It depends on slab thickness, brand instructions, edge detail, base design, and span. Some 2 cm tops may require a subtop or closer support, while many 3 cm cabinet-supported tops are installed over perimeter support. A freestanding table often needs a designed frame rather than a simple plywood panel.
How much overhang can quartz have without brackets?
There is no single safe number for every quartz table top. Some manufacturer guidance allows larger unsupported overhangs for thicker slabs on standard cabinet bases, but freestanding tables, narrow pedestals, seams, cutouts, and high-use seating areas need a more conservative support plan.
Can hot pans damage a quartz table top?
Yes. Quartz can resist ordinary household use, but direct or sustained heat can discolor resin, cause thermal stress, or contribute to cracking, especially near edges and cutouts. Use a trivet, hot pad, or heat-resistant board under hot cookware and heat-generating appliances.
Does quartz need sealing after installation?
Usually no. Engineered quartz is generally nonporous and is not maintained like many natural stones. Sealer may sit on the surface instead of penetrating, which can create uneven sheen. Follow the selected brand’s maintenance guide for approved cleaners and stain procedures.