How to install a stone coffee table safely at home

a[data-rs-seo-link]{text-decoration:underline!important;color:#1a56db!important;cursor:pointer!important;}a[data-rs-seo-link]{text-decoration:underline!important;color:#1a56db!important;cursor:pointer!important;}
Start with the installation plan, not the table
A stone coffee table should be treated as an installation task, not just another piece of furniture to set down. The top may be heavy, rigid, difficult to grip, and vulnerable to edge chips if it is handled poorly. A safer process is to confirm the table construction, measure the route, protect the floor, position or assemble the base first, then set and level the stone top with enough people to control the load.
If the table uses a separate stone slab and base, do not guess about adhesives, brackets, suction cups, pads, or fasteners. Follow the manufacturer’s instructions when they are available. Use this guide as a practical checklist for planning, placement, leveling, protection, and routine care.
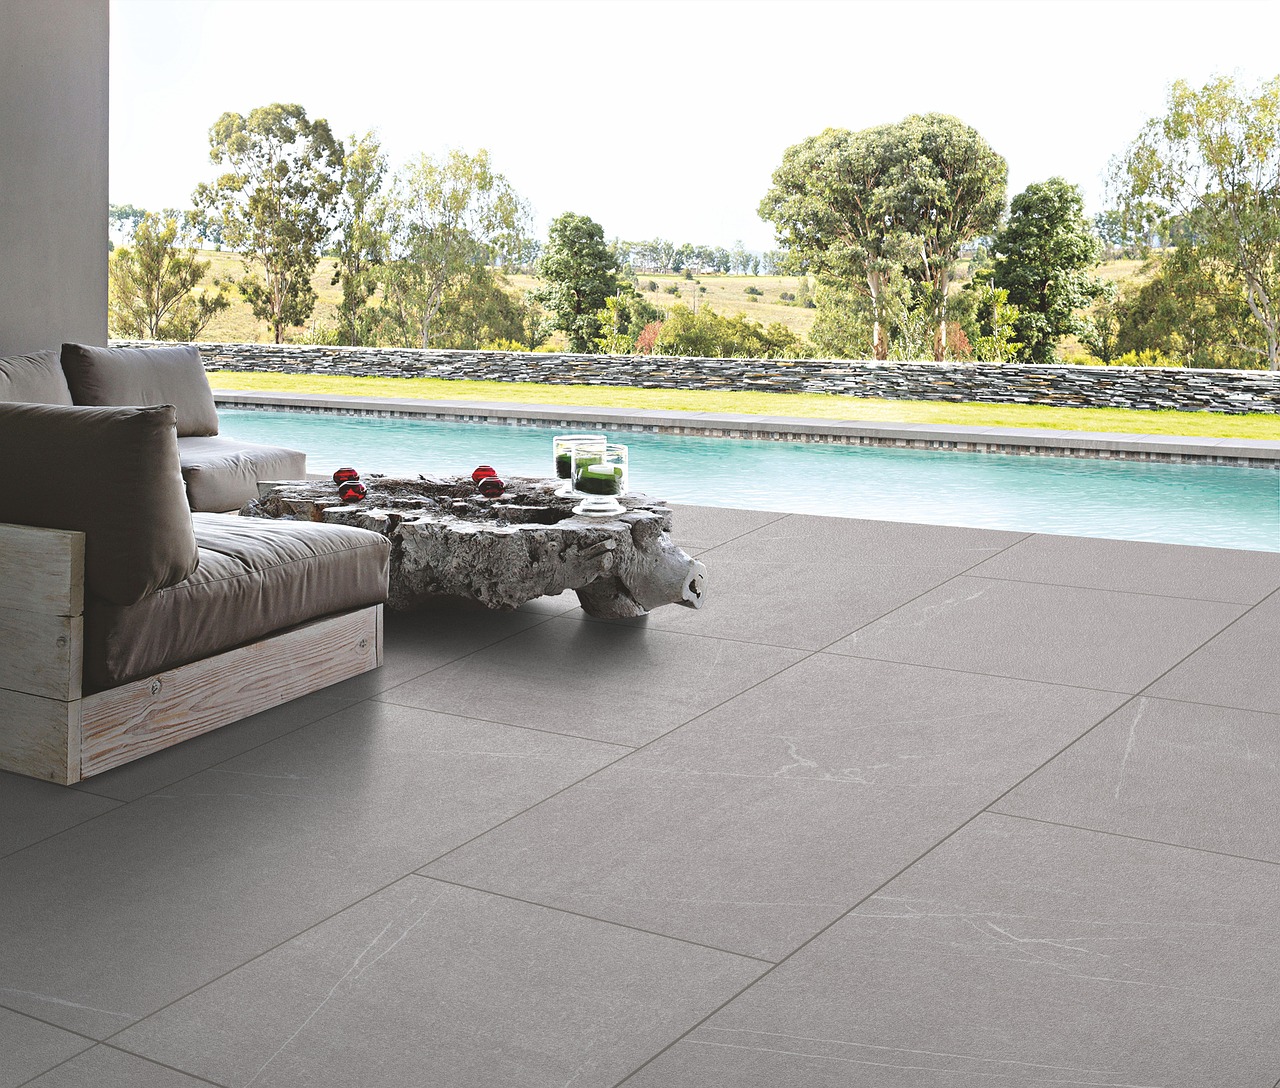
For more home material and fixture setup articles, browse the Installation Guides section.
Identify the type of stone coffee table you are installing
The right method depends on how the table is built. Some stone coffee tables arrive as one complete unit, with the slab already fixed to the frame. Others ship as a loose stone top with a separate metal, timber, stone, or composite base. Some designs use a nested pedestal, hidden pins, non-slip pads, or mechanical fasteners. These should be handled as different installation tasks, not as one universal process.
A fully assembled table mainly requires route planning, careful lifting, floor protection, and final leveling. A separate slab-and-base table also requires alignment, a check of the bearing points, and confirmation of whether the top is intended to remain removable or become fixed. If the top is supported only by pads, the base must be wide and stable enough to resist tipping. If the top is bonded or fastened, the adhesive or hardware must be compatible with both the stone and the base material.
Natural stones such as marble, granite, limestone, travertine, slate, and quartzite vary in density, porosity, veining, surface finish, and resistance to staining. Engineered stone and sintered stone tops may behave differently when drilled, bonded, or cleaned. Before installation, identify the stone or surface material from the order documents, label, or supplier paperwork. That information affects sealer choice, cleaner choice, edge protection, and whether drilling or modification is appropriate.
Check weight, floor protection, and base compatibility
The most common installation error is underestimating the weight of the stone top. A modest-looking slab can require two or more adults to carry safely, especially when it is thick, long, or hard to grip. As a rough planning value, many dense stone tops can be estimated at about 170 pounds per cubic foot, although actual weight depends on the stone species, thickness, reinforcement, and fabrication method.
| Example stone top size | Planning assumption | Approximate top weight |
|---|---|---|
| 42 x 24 x 0.75 in | Dense stone at 170 lb/ft³ | About 74 lb |
| 48 x 28 x 0.75 in | Dense stone at 170 lb/ft³ | About 99 lb |
| 54 x 30 x 1.25 in | Dense stone at 170 lb/ft³ | About 199 lb |
These figures are not a substitute for the supplier’s stated weight, but they show why planning matters. Even a thin stone top can be heavy enough to damage flooring, pinch fingers, strain backs, or tip an unstable base. If the table is unusually large, thick, or being installed on an upper floor, check the product weight and confirm that the floor structure, elevator, stair route, and doorway clearances are suitable.
Base compatibility is as important as slab weight. The base should support the stone at the intended bearing points without creating pressure concentration under a weak corner or vein. Long overhangs can create leverage that makes a table feel unstable even when the top itself is strong. In practical terms, the base should sit flat, resist wobble, and support the slab broadly enough that normal use will not cause rocking or tipping.
Protect the finished floor before anything enters the room. Use clean moving blankets, temporary floor runners, or rigid sheet protection along the carrying route. Avoid dragging the base or slab across wood, vinyl, polished concrete, tile, or natural stone floors. If the table uses narrow metal legs, consider felt pads, rubber glides, or manufacturer-approved floor protectors after final leveling.
Prepare the room and route before lifting
Prepare the room before the delivery crew or helpers arrive. Measure the tabletop, base, doorway widths, hallway turns, stair clearances, elevator opening, and ceiling height at tight turning points. Remove rugs that could slide, low lighting fixtures that could be hit, loose cords, fragile decor, and nearby furniture. The route should allow carriers to move slowly without twisting the stone or setting it down on an exposed edge.
Keep the stone vertical or well supported during transport according to the supplier’s instructions. Large stone pieces are often strongest when handled in ways that reduce flexing. Carrying a long, heavy slab flat without enough support can increase stress in the middle, especially around cutouts, weak veining, or repaired areas. Coffee table tops are smaller than countertops, but the same handling principle applies: control the load, protect the edges, and avoid sudden impact.
Use the right helpers and equipment. At minimum, plan for enough people to lift the top without anyone reaching beyond a comfortable grip. For heavier pieces, use professional movers, stone handlers, lifting straps, or suction-assisted equipment only when it is appropriate for the surface finish. Suction devices may not hold reliably on some textured, honed, leathered, dusty, wet, or porous surfaces, so they should not be treated as universal lifting tools.
Prepare a soft, clean staging area near the final location. If the top must be set down temporarily, rest it on padded blocks or a protected flat surface, not directly on a corner, sharp edge, or gritty floor. Grit trapped under stone can scratch both the slab and the floor. Keep the packaging until the table is fully inspected, because it may be useful if the piece has to be repositioned or returned.
Set the base first, then place the stone top
Install the base before lifting the stone into place. Position it in the room, check that it sits flat, and confirm the orientation. If the base has adjustable feet, start with them in a middle range so you can raise or lower individual points later. If it uses a pedestal, cross frame, nesting frame, or multiple supports, make sure each contact point is clean and properly seated.
Next, inspect the underside of the stone top. Look for factory-applied pads, threaded inserts, embedded plates, resin reinforcement, mesh backing, or marked bearing zones. Do not drill new holes into a stone top unless the manufacturer or a qualified fabricator confirms that drilling is allowed. Drilling can crack some stones, damage reinforcement, weaken the edge, or void a product warranty.
If the table uses non-slip pads, place them exactly where the maker intends. Pads can help isolate vibration, reduce point pressure, and protect polished contact surfaces, but they cannot compensate for an undersized or unstable base. If the table uses adhesive, use only the specified product and amount. General construction adhesives, acidic products, or unsuitable silicones may stain stone, fail to bond, or make future removal difficult.
- Place the base in the final approximate position.
- Clean the top of the base and underside contact areas with a dry, lint-free cloth.
- Install manufacturer-supplied pads, clips, pins, or brackets.
- Lift the stone top evenly, with all helpers communicating before each movement.
- Lower the top slowly onto the bearing points rather than sliding it across the base.
- Step back and confirm overhang, alignment, and access around seating.
Avoid sliding the stone top after it touches the base unless the manufacturer says the contact pads allow adjustment. Sliding can scuff a metal base, dislodge pads, scratch the underside, or chip a fragile edge if the slab catches. If the position is wrong, lift slightly, reset, and lower again. See also: Building Materials.
Level the table and reduce tipping risk
Once the top is in place, check the level from front to back and side to side. A coffee table does not need the same precision as a countertop, but visible tilt can make objects slide and can exaggerate instability. Use a small level across several directions, then adjust feet or shims as needed. Shims should be stable, concealed, and compatible with the flooring. Do not use soft scraps that may compress unevenly over time.
Rocking usually comes from one of three issues: uneven flooring, a base that is not fully seated, or a slab that is bearing on too few contact points. Identify the cause before adding more pads or tightening hardware. Tightening one fastener too much can introduce stress if the opposite side is unsupported. Stone performs best when loads are distributed rather than forced through one point.
Tipping risk needs particular attention in homes with children, pets, or high-traffic seating areas. A heavy tabletop can still tip if the base is narrow, if the overhang is large, or if someone sits or leans on the edge. Low tables are often treated casually, but stone edges are unforgiving. If the design feels unstable during a controlled check, stop using the table until the base, hardware, or placement is corrected.
For removable tops, confirm whether anti-slip pads are enough for normal household use. For fixed tops, confirm that brackets, pins, or adhesive have cured or locked as directed before moving the table again. If the table was supplied with anti-tip or anchoring hardware for a special installation, do not omit it for appearance alone. Hardware that appears minor may be part of the safety design.
Clean, seal, and protect the stone after installation
After installation, remove dust with a soft cloth and clean the top with a stone-safe cleaner or a mild product approved for the specific surface. Avoid acidic cleaners on acid-sensitive stones such as marble, limestone, and travertine. Vinegar, lemon-based cleaners, and harsh bathroom products can dull or etch some stone finishes. Abrasive pads can also scratch polished or honed surfaces.
Sealing depends on the stone and finish. Many natural stones benefit from a penetrating sealer, but not every stone needs the same product, and some engineered or sintered surfaces may not accept sealer in the same way. If the supplier states that the surface is pre-sealed, note the expected maintenance interval and the recommended cleaner. If the surface is not sealed, test any sealer in an inconspicuous area before applying it to the whole table.
Daily protection is simple but important. Use coasters under glasses, trays under candles or planters, and felt under decorative objects that are moved often. Wipe spills promptly, especially coffee, wine, citrus, oil, and colored liquids. Do not place very hot cookware directly on the table unless the manufacturer specifically allows it. A coffee table is not designed to perform like a kitchen worktop, even when both are made from stone.
Edges and corners need extra care. A rounded or eased edge is generally more forgiving than a sharp mitered edge, but any stone edge can chip from impact. Keep metal toys, heavy ceramics, tools, and vacuum heads from striking the perimeter. If a small chip appears, ask a stone repair professional whether resin filling or polishing is appropriate rather than attempting a visible repair with unsuitable glue.
Common installation mistakes to avoid
- Skipping the weight check: Even a medium stone coffee table can be too heavy for one person to handle safely.
- Dragging instead of lifting: Dragging can scratch floors, twist the base, and chip the slab edge.
- Using random adhesive: Some adhesives stain stone or create a bond that is too rigid for the design.
- Ignoring bearing points: A slab supported only at small points may rock or experience unnecessary stress.
- Overlooking floor slope: Older homes and uneven tile floors often require careful leveling.
- Cleaning with acidic products: Acid-sensitive stones can etch or lose their finish.
- Assuming all stone behaves the same: Marble, granite, travertine, slate, quartzite, engineered stone, and sintered stone have different care and fabrication limits.
The safest installation is usually the most controlled one: plan the route, protect the floor, lift with enough help, use the supplied hardware or pads, level patiently, and maintain the surface with products intended for the material. If any part of the process involves drilling, structural anchoring, very heavy lifting, cracked stone, unclear hardware, or an unstable base, pause and get help from the supplier, installer, or a qualified stone professional.
Frequently asked questions
Can one person install a stone coffee table?
One person may be able to position a small assembled table, but many stone tops are heavy, awkward, and easy to chip. If the top is separate, thick, or difficult to grip, use at least two capable adults or professional movers. The risk is not only the weight; it is also loss of control during turns, lowering, and alignment.
Should a stone coffee table top be glued to the base?
Only glue the top if the manufacturer or fabricator specifies adhesive installation. Some designs are intended to remain removable on non-slip pads, while others use pins, clips, brackets, or adhesive. The wrong adhesive can stain the stone, make repairs difficult, or fail under movement.
How do I stop a stone coffee table from wobbling?
First check whether the floor is uneven, the base is twisted, or the stone is not bearing evenly. Adjust leveling feet if provided, use stable shims when appropriate, and make sure pads or supports have not shifted. Do not force the slab down with hardware to hide a support problem.
Does a stone coffee table need sealing?
It depends on the stone, finish, and factory treatment. Many porous natural stones benefit from a penetrating sealer, while some dense stones, engineered surfaces, or sintered materials may require different care. Follow the supplier’s care sheet and test any sealer before full application.
What is the best way to protect the floor under a stone coffee table?
Use suitable glides, felt pads, or rubber protectors on the base after final leveling, and avoid dragging the table. During installation, protect the route with clean moving blankets or temporary floor covering. For delicate flooring, confirm that rubber or adhesive-backed pads will not discolor the finish.